Hello Everyone, This is a post about Top 4 ways to import passwords from CSV in Google Chrome. As we know, Google Chrome or other browsers save passwords in their application, we can see this in a browser application or can be export as a CSV file. For exporting a password file as CSV format is very easy for us, but importing a CSV file is not an easy deal. Sometimes, we need to export another browser’s password and import it in another browser, so Google Chrome facilitates these services but unfortunately, this is hidden for importing a CSV file. Today, we are going to see about 4 ways to import passwords from CSV in Google Chrome. Google Chrome only offers you the ability to import passwords directly from Firefox. But that also requires having both browsers installed on the same PC or Mac.
Note: CSV term is compressed by Comma Separated Values and CSV file is used to store the user name, destination address, and password in simple text but it is secure until your password hasn’t revealed by anyone. if you want to export your saved password onto a local machine, you have must only your own privileges to access it. you have to set the restriction on this file to never accessed by anyone.
1. ENABLE PASSWORD IMPORT PROPERTY FROM CHROME FLAG
Table of Contents
We can import a password forcibly to chrome using a chrome flag experimental panel. Chrome Experimental panel will provide a way to enable the authority to import a password from the CSV file for the Google Chrome browser. We have to enable the Password Import browser flag from Chrome Experimental panel, by default it is set to default property value. Enabling this feature to provide the ability to import a CSV file into Google Chrome. The process involves restarting your browser, so save your work before going through the steps below.
Step 1: Open your Google Chrome Browser and type the text “chrome://flags” in the URL Bar.

Step 2: In this Page, Search the String “Password import”.
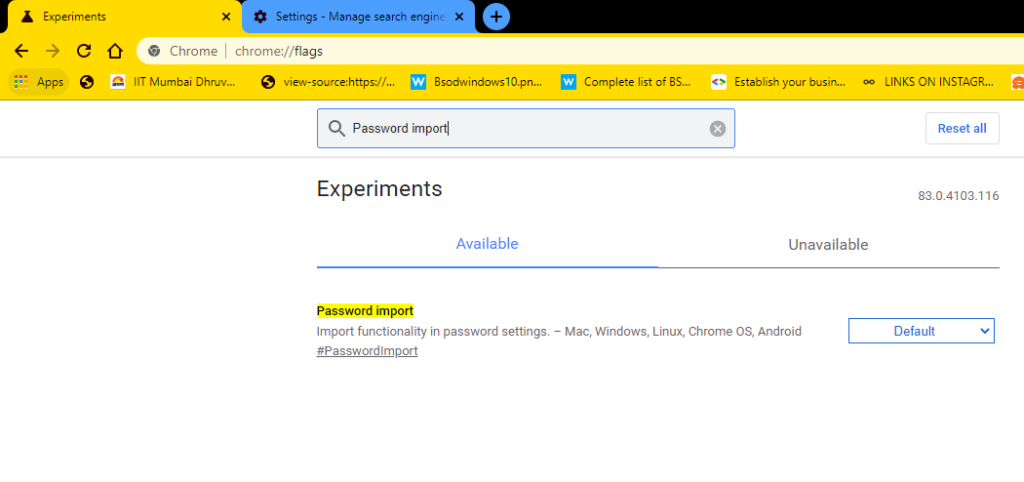
Step 3: Click the Password Import Value Button and change the value from “Default” to “Enabled”.
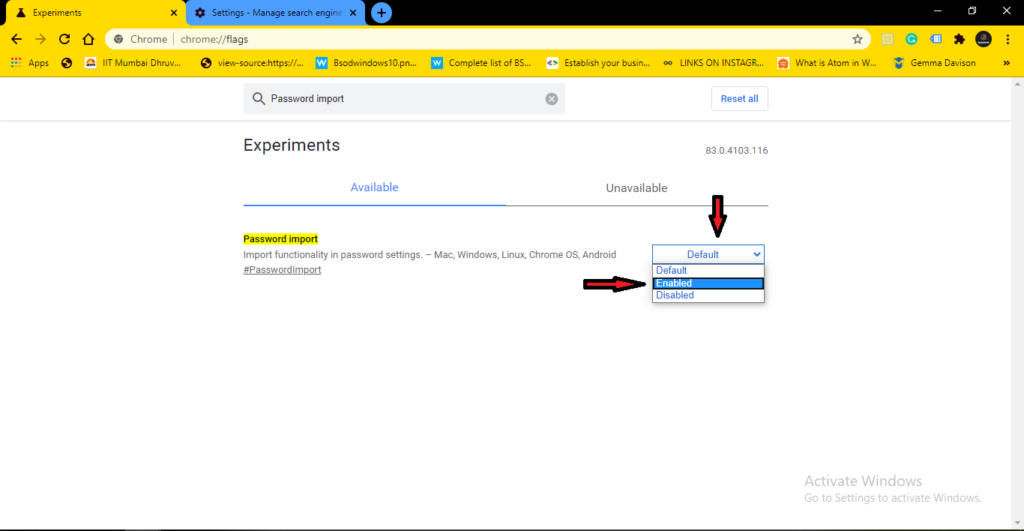
Step 4: After change the value, click the “Relaunch” the button

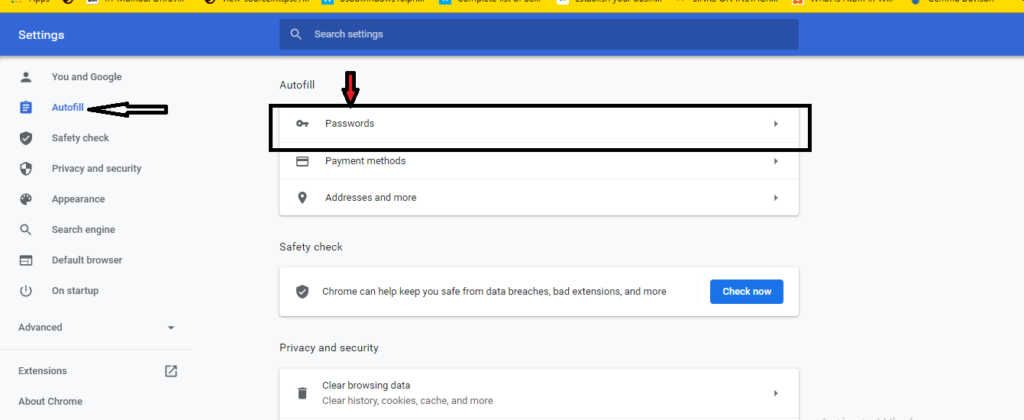
Step 5: Restart the Chrome Browser and click the three vertical dots and jump to the “setting menu”.

Step 6: Click the “Autofill” button then click the “Passwords” Button.
Step 7: Go to Saved Password Option and click “the three dots” on right hand side.
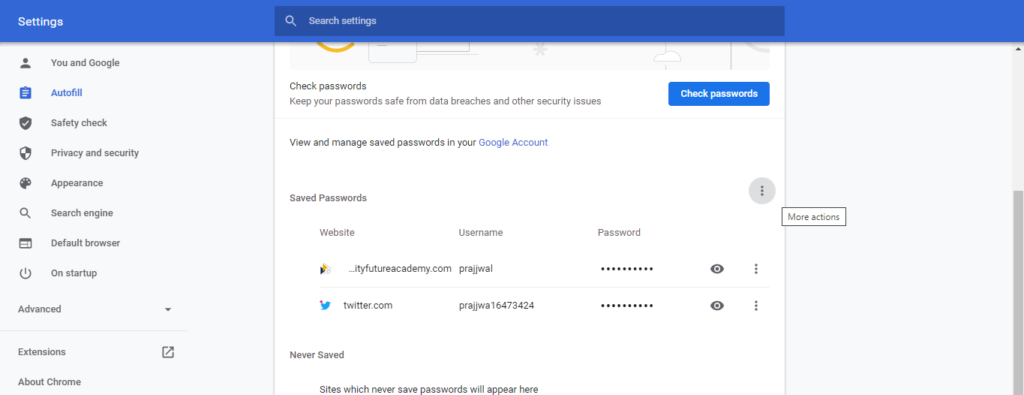
Step 8: After Choose the “Import” menu option.

Step 9: Choose your exported CSV file in your Drive’s folder.

Step 10: After Click on the “Open” button, you will see that all CSV contents are imported and shown in your browser application as showing in the below picture.

You should then find all imported passwords merged with any existing passwords in Chrome. Similar entries will be replaced. After importing, you can set to the “default” value of the password import option in the experimental window.
2. ENABLE CSV PASSWORD IMPORTING VIA COMMAND PROMPT (CMD) OR TERMINAL
if you don’t want to import a password via CSV file through the flag method. you can use the other three types of methods to enable the ability to import the password in the chrome browser. This is also a genuine method for forcibly enabling the ability. we can use the command prompt to complete the task successfully.
NOTE: Exit all running instances of Google Chrome before you begin. You can use another browser to go through the steps below, or you can copy them offline for reference.
Windows – Command Prompt
Step 1: Go to your window’s search box and type “Command Prompt”
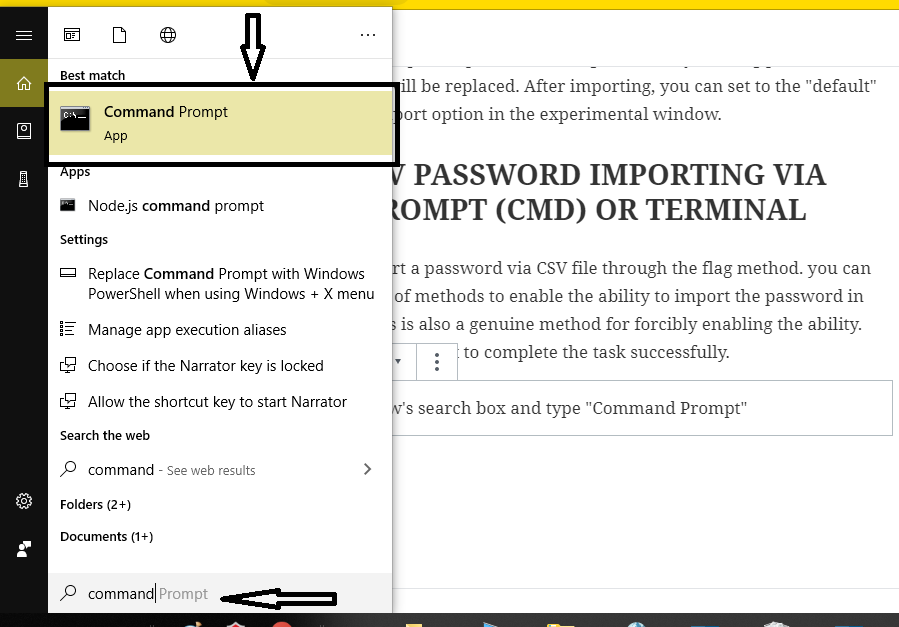
Step 2: Type the following Command – Copy the following command and paste in the your command console window.
cd "\Program Files (x86)\Google\Chrome\Application"

Step 3: Copy and paste the following command which is written in the below section-
chrome.exe -enable-features=PasswordImport

Step 4: After Press the Enter Button, Navigate Chrome setting (three dots) > Setting Option >> Passwords >> import Option.

Click the option labeled Import, and then select the CSV file that you want to import your passwords from.
Furthermore Reading
3. Use DevTools to Unhide Import option
An alternative method to forcibly activate the ability to import passwords is to use the built-in DevTools functionality in Chrome to ‘unhide’ the Import option. But just like with the method above, you must perform this each time you want to import passwords via CSV in Chrome.
Step 1: Navigate to Chrome Settings >> Passwords >> and then click the three-dot icon next to saved Passwords. Next Right-Click “Export Passwords” then click the inspect option.

Step 2: On the DevTools pane that shows to the right side of the screen, locate the word labeled ‘hidden.’ It’s located just above the element highlighted by default.

Step 3: Double-click ‘hidden’ to select it.
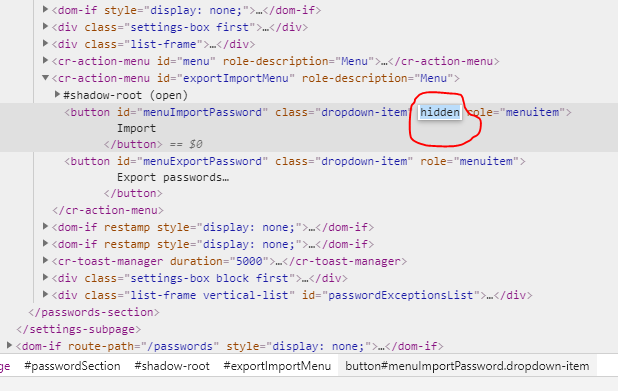
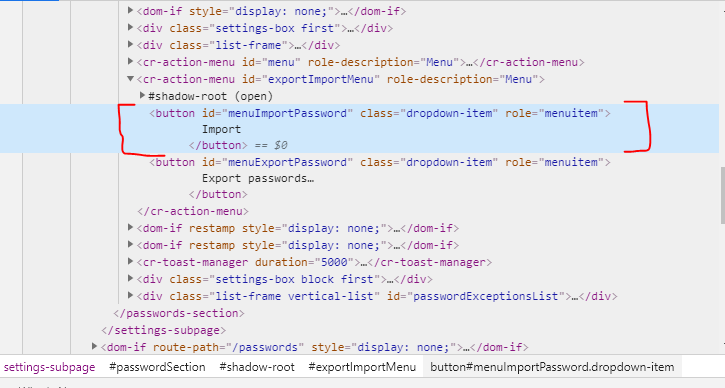
Step 4: Press the Delete key to delete the selected word. Follow by pressing the Enter key. The result should look similar to the screenshot below.
Step 5: Shift your focus from the DevTools pane to the Passwords screen. Click the three-dot icon next to Saved Passwords, and you should see the Import option listed within. You can then use it to import passwords from a CSV file.
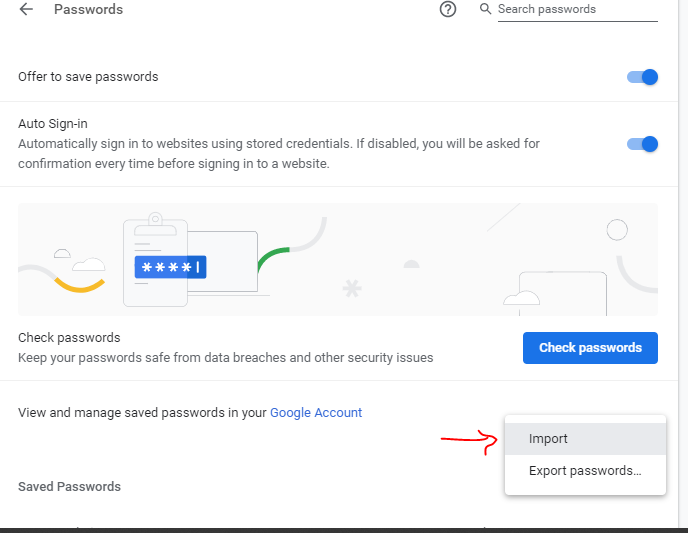
You can exit the DevTools pane. But if you move away from the Passwords screen, you must go through the steps above to unhide the Import option again.
4.Create the Shortcut for Chrome.exe file
This way is the easiest way to enabling the import option ability for importing the password from CSV file, but one thing remember that, whenever you want to import the password from CSV file, you must open chrome using shortcut for chrome.exe file.
Step 1: Go to your source folder where chrome.exe file located. In my Computer, different directory is used for chrome.exe file. you have to move on according to your specified directory or search the “chrome.exe” file through My Computer “Search Box”.
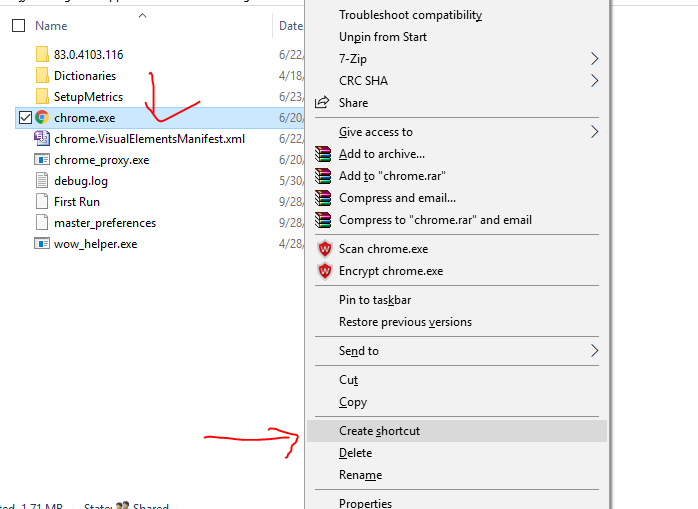
Step 2: After creating a shortcut, copy the shortcut file and paste it in your Desktop folder.
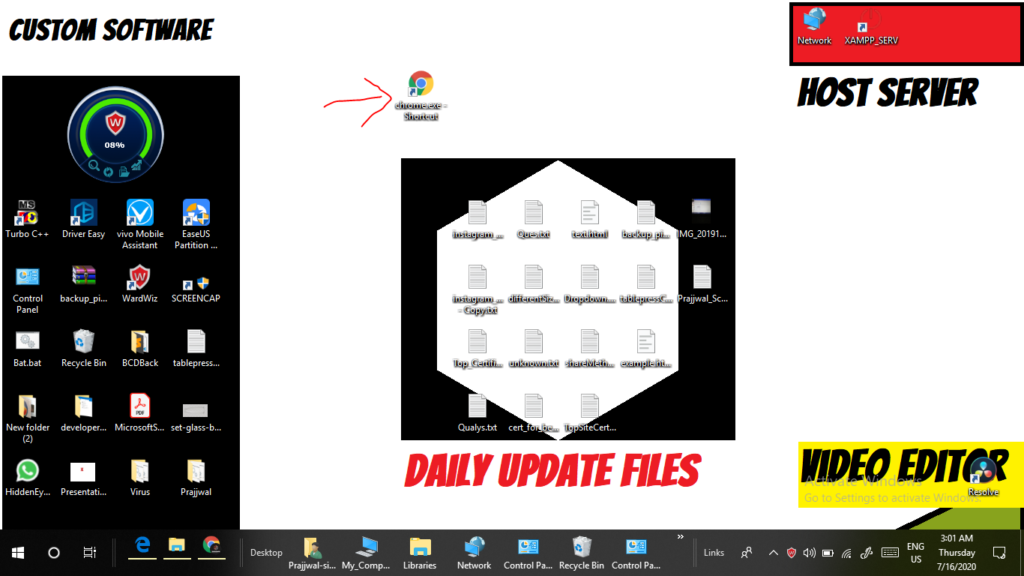
Step 3: Right click on the shortcut icon and go to the properties option.

Step 4: Click the Properties Option >> Edit the Target value and add the following text.
-enable-features=PasswordImport

Step 5: After editing in the target attribute’s value, click the Apply button, and then click the Ok button.
Step 6: Navigate to Chrome Settings >> Passwords >> then click the three dots icon >> Choose and import the CSV file that you wanted to assign in chrome.
Last Lines: for import passwords from CSV in Google Chrome
I hope you all are understood that How to import CSV file into Google Chrome. If you like my post, you can read my other posts. Share this post to your techie friends and social media. Thank you for reading……


Pingback: Top 5 Fast and Secure VPN Apps for Android>>BittuTech
Pingback: 10 Best Facebook Lite App Tips and Tricks in 2020