Hello Geeks, welcome to this website (www.bittutech.com). Today we are going to know that, How to disable all removable media from Windows 10 without any third-party software, we will follow some steps and its after our machine will not support any removable media such as flash drive, CD/DVD e.t.c. we can enable and disable the service according to ourselves’s choice.
Someone’s question was – How to disable the read,write and execute services for removable media such as flash drives,CD/DVD from Windows 10?
sometimes we have noticed that the victim’s computer/mobile phone has destroyed by only one malware-infected flash drive without warning, it can be possible on your machine. we can disable the write, read, and execute services for unwanted removable drives.
Some malicious codes, viruses, worms can be very harmful for your system. it can cause various harmful issues such as –
- it can delete any files without displaying pop-window.
- break your system’s file.
- break your files into smaller chunks, this will generate the result – broken files, or files couldn’t open.
- malware can detect your sensitive information and can also steal the information.
- Hackers and other sensitive data hunters use these techniques to create a backdoor to your system.
we will see in this post, How to prevent the access of read, write, and execute services for unwanted removable media to secure our system.
we are going to disable these accesses (R-W-X) from Microsoft Management Console file. from where, we can enable the “deny all classes for removable media” option to prevent the access of any removable media.
Let’s go ahead and get started –
we will see step by step procedure to reach the intended goal.
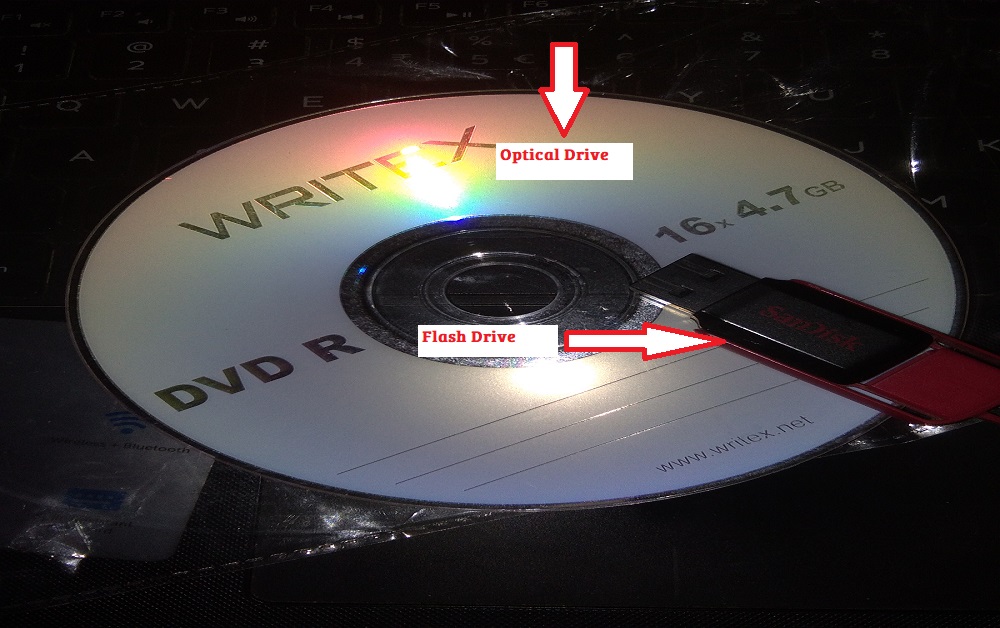
Step 1: you will need at least one flash drive or pen drive to check of this process is working properly or not. I have two removable media, one is a flash drive and the other is an optical disk.
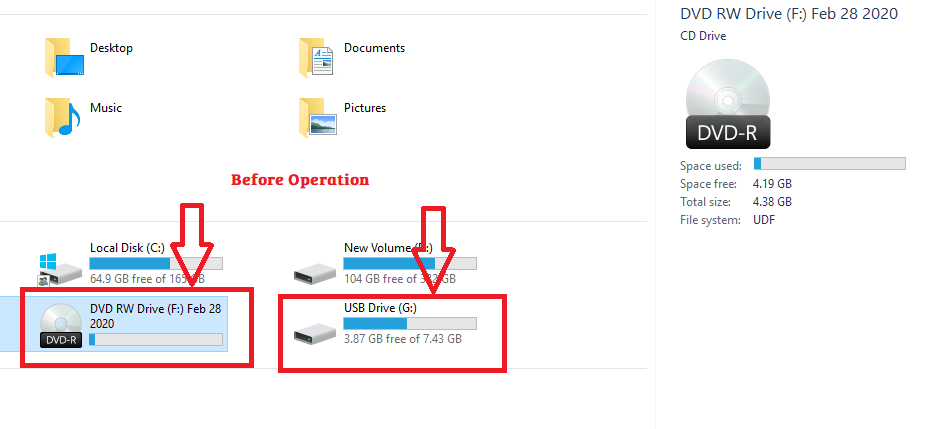
Step 2: Plug in your removable media into your windows PC/Laptop/Tablet and check it out, it works properly or not.
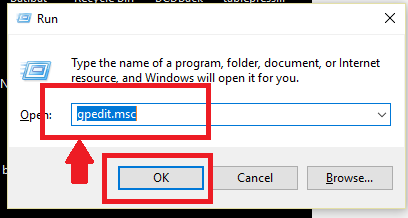
Step 3: Open the Graphical “Run” Application window by typing in the search box “run” or press the keyboard key “Win + R” to open the “Run Application” Window. After open, type the “gpedit.msc” filename and click the “OK” button.
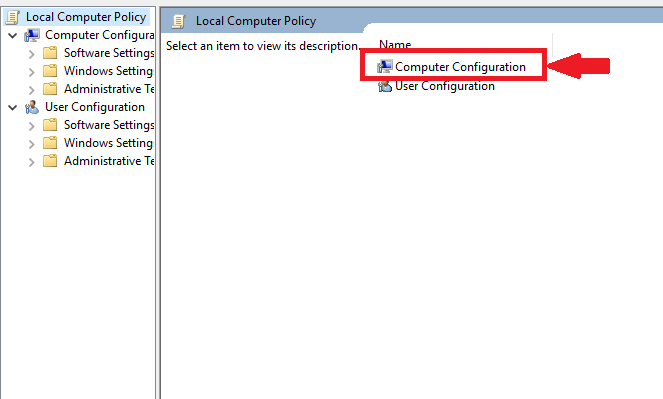
Step 4: Click on the “Computer Configuration” Option.
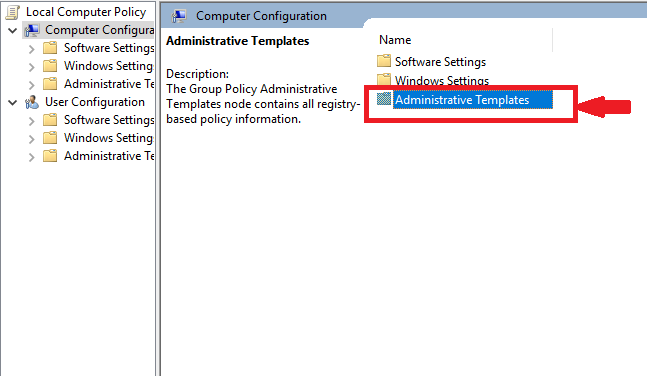
Step 5: Click on the “Administrative Templates” option.
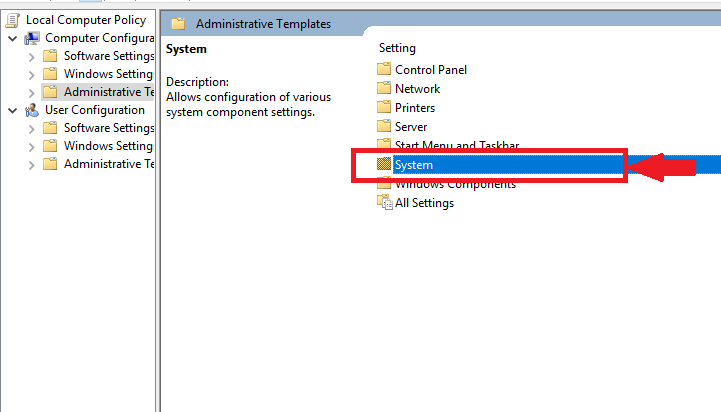
Step 6: Click on the “System” option.
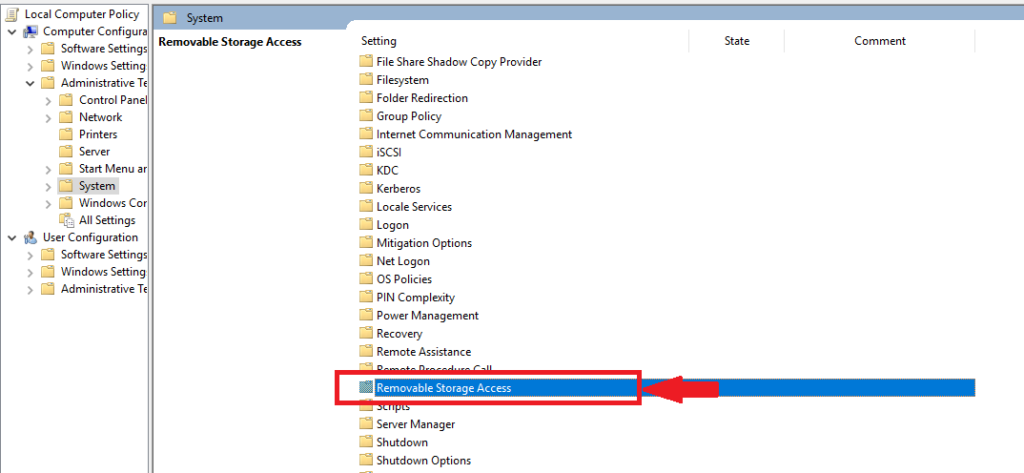
Step 7: Scroll down the page and click on the “Removable Storage Access” option.
Step 8: Click on the “All Removable Storage classes: Deny all Classes“.
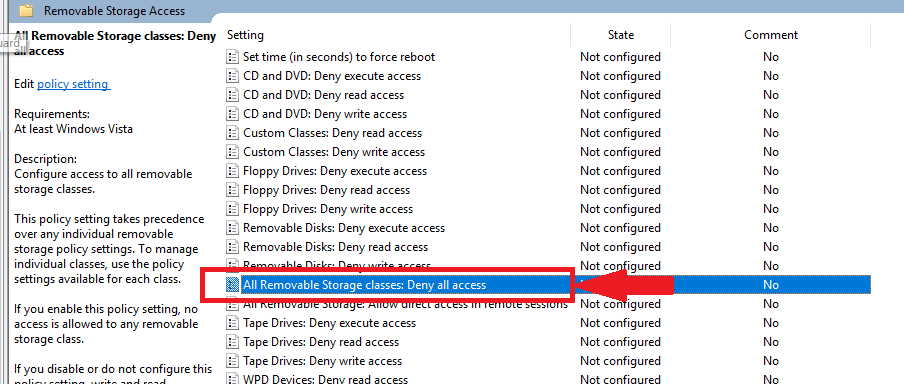
Step 9: Click on the “Enable” radio button option, then click “Apply” button and then “OK” button.
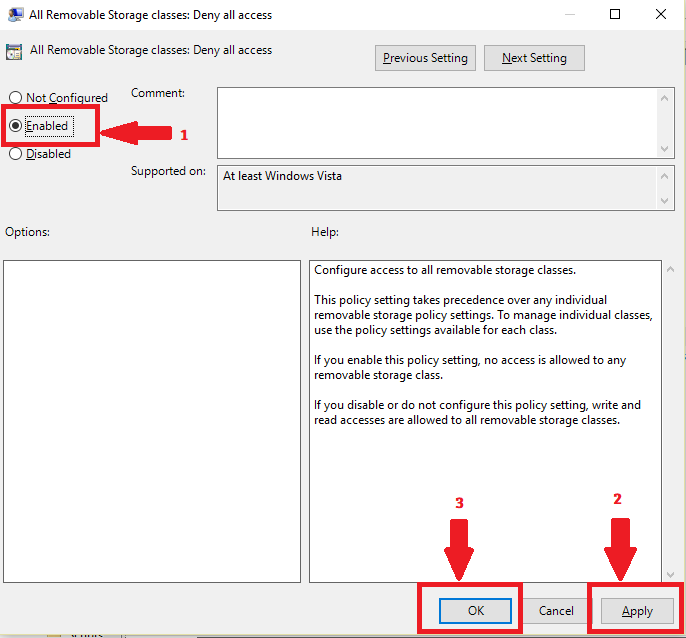
Step 10: Close the “Group Policy Editor” window and open the “My Computer” Window. after opening the “My Computer” window check it out your removable drive is working or not? Plug out your removable media and Plug-in again. you will see any removable media will not work or not accessible.
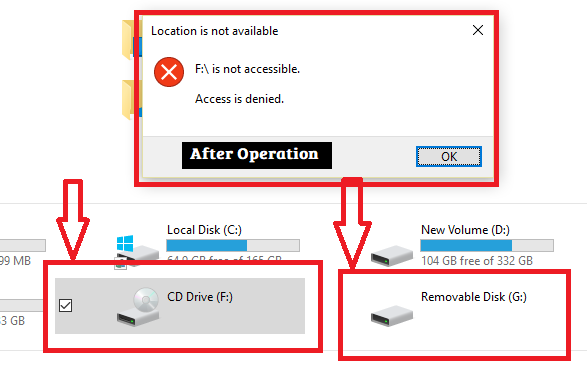
That means, anybody can not inject any type of malicious files via flash drive or optical discs. now, you are safe!!
Anybody can not read, write, and execute any type of malicious or non-malicious files through removable media.
Note: If you want to use your removable media, you have to disable the deny all classes service, from where you had enabled this service.
That’s it for now, we will meet soon with a new interesting article. I hope, you have to enjoy this article.


