Hello dear visitors, your most welcome in this domain(www.bittutech.com). Today, we are going to know about How to change/convert a Java Project/Program into an Executable file format? We have seen that mostly Java Project/Program contains two type of major files – (1) .java file and (2) .class file.
We would have studied Java in the first semester of Graduation in the Computer Science/Computer Application field. We would have made many programs and projects during that time, but probably, we wouldn’t have learned that How to convert a java project into a java archive file and convert the java archive file to an Executable file format.
Don’t bother from it, we will learn those things in this post and we will know that How to execute Java Program without JRE(Java Runtime environment).
First of all, we are going to know about JAR and EXE file format with brief introduction.
What is JAR File?
Table of Contents
JAR file is also known as Java Archive file, which is used to encapsulate your java projects including package, classes, and objects with images and documentation in one file. JAR files work on distribute mechanisms to give our programs or projects to others.
It is a combination of heterogeneous files such as java source code, java class file, text file for documentation. we can contain various packages and classes in one JAR(java archive) file. it also helps to distribute our program to others in an easy way.
What is an Executable file (.exe)?
Executable files are those files which contain only machine language or combination of 0’s and 1’s binary digits. we can execute these files without any external environment or without the help of virtual CPUs. (.exe) the file is a type of Executable file that basically runs on Windows OS with the help of physical built-in CPUs.
Each and every program basically passes through three categories.
- Source Code
- Object Code
- Machine Code
How to convert your java project into a .exe file?
Most often, we are using an Eclipse-based built-in java interpreter to run all Java projects either graphical projects or command-based projects. But if we want to do something different, and don’t want to use JRE(Java run-time environment) to execute our program without the help of JVM(java virtual machine), so we have to perform some basic work and after we can execute our java projects without the help of any downloaded virtual CPU. It means we have to convert our java projects into .exe file format.
Number of Steps to be needed to convert java projects into .exe file
There will follow multiple steps to convert our Java Projects into Executable file format(.exe). Before moving on towards, we have to know that What are the advantages of converting your java projects in .exe file?
- A .exe file doesn’t depend on virtual processors.
- A .exe file is a type of executable file for simply run on a Windows machine.
- A .exe file contains machine code and runs faster than others.
- A .exe file can run on another Windows PC without any external environment.
- A .exe file is also known as a binary file or non-human readable file.
Convert Java Programs/Projects into one .exe file
Finally, we are going to see that How to convert java projects into .exe file.
Step 1: Choose your Java Project from the Eclipse
You have to choose your project from Eclipse Java development Application and you have to follow several simple steps to firstly convert your java project into JAR file then you may be able to convert your JAR file into .exe file. Follow the below Screenshots.
First Step : Open Eclipse and Choose your Java project then Right Click on your project and select the Export Option.
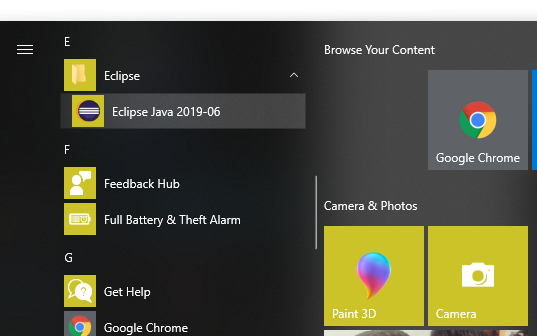
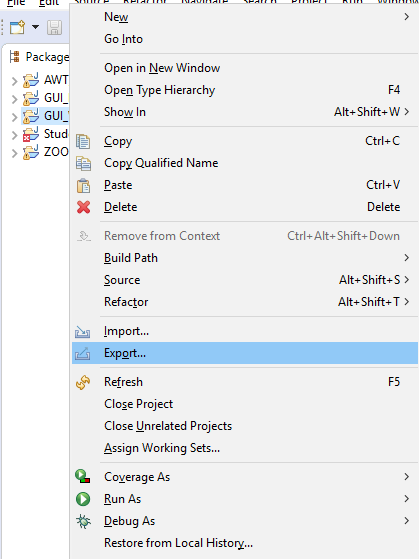
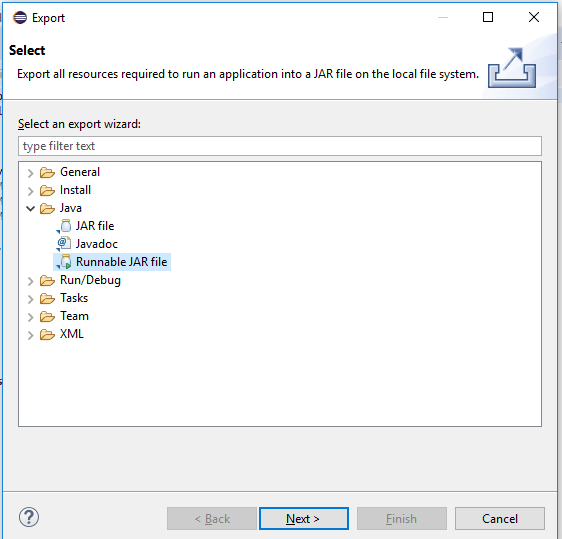
Step 2: After select Export Option, select the Runnable Jar file option from the Next Window.
Step 3: Choose the Export Destination directory and file name.
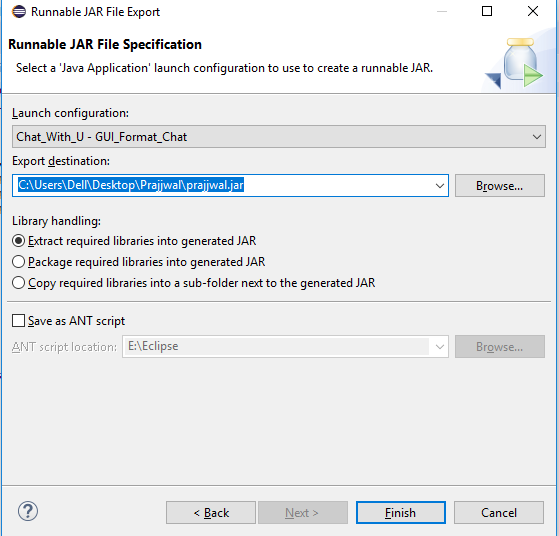
Step 4: Click the Finish Button and check your Jar file is existing or not in your intended directory.
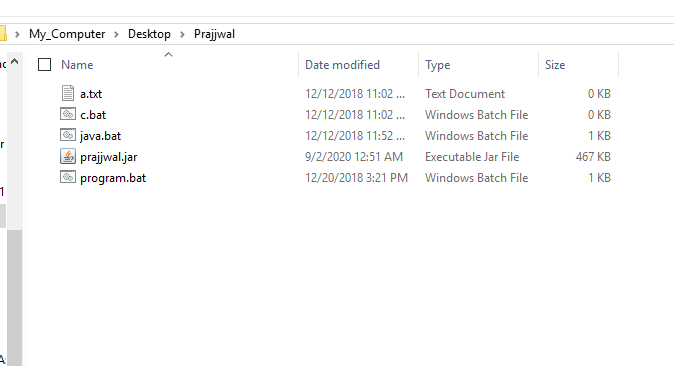
Step 5: Download launch4J application on your windows PC/Laptop to convert your JAR file into .exe format.
Step 6: After downloading the Application, double click on the downloaded exe file and install it on your PC/Laptop.
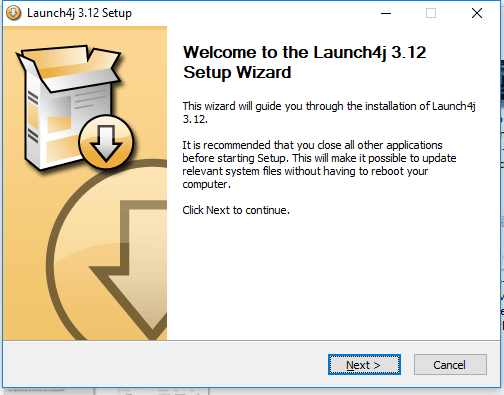
Step 7: Launch the Launch4J application after installing on your machine.
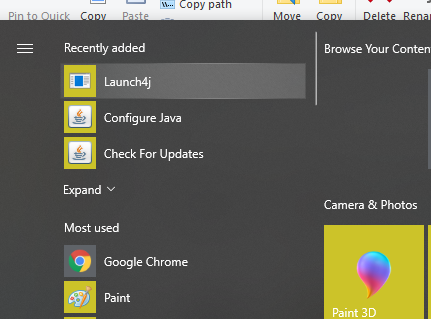
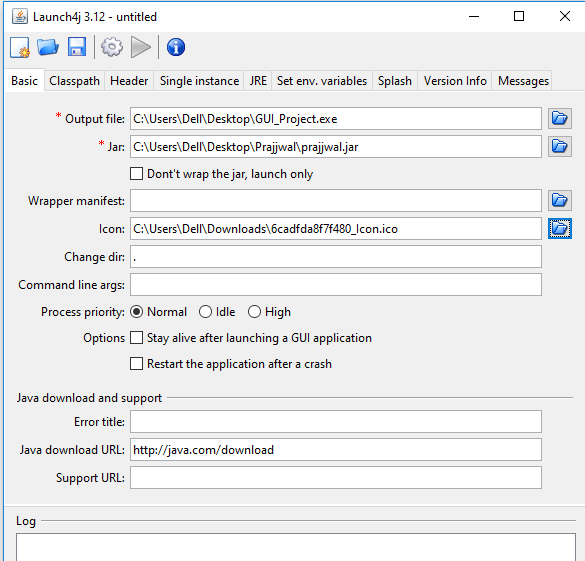
Step 8: Choose the Output file Location and give the Jar file location. you can also add file icon, but it is not necessary.

Step 9: After Basic Setting, you have to jump on the Jar tab for setting the minimum JRE version requirements.
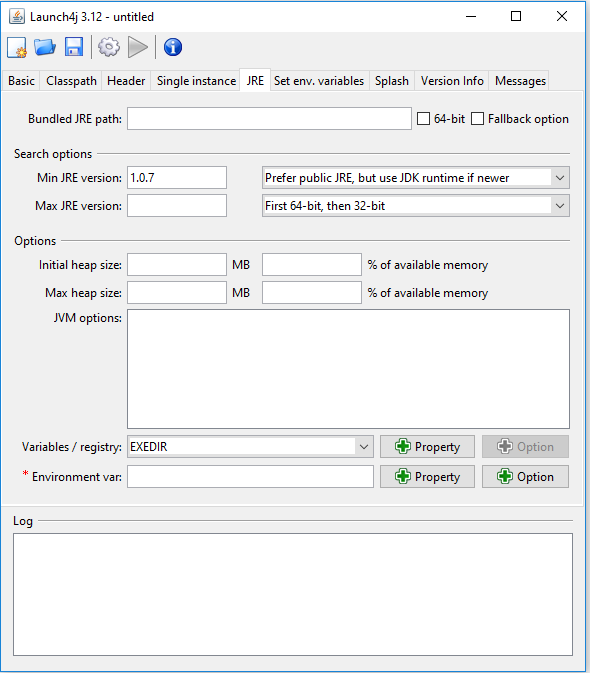
Last Step: after completing the setting, you have to click on the Gear icon or Setting icon at the top of the below window.

So, now you can see your .exe file with/without icon. I use Google icon in place of by default exe icon. GUI_Project.exe is my Java project and i can run on any windows machine without the help of JVM or JRE.

Last words: That’s it for now. We will meet again with a new interesting article. Stay tuned with us. You can join us on social networks and get the latest update for newer post.


